Difference between revisions of "Scripting environment setup"
m |
|||
| Line 7: | Line 7: | ||
* Download and install a "Eclipse IDE for Java Developers" or "Eclipse for RCP and RAP Developers" (the latter is more useful for regular Freeplane developers) from [http://www.eclipse.org/downloads/packages Eclipse download page]. | * Download and install a "Eclipse IDE for Java Developers" or "Eclipse for RCP and RAP Developers" (the latter is more useful for regular Freeplane developers) from [http://www.eclipse.org/downloads/packages Eclipse download page]. | ||
* Launch Eclipse for the first time and select some directory as your workspace root | * Launch Eclipse for the first time and select some directory as your workspace root | ||
| − | [[File:Eclipse-select-workspace.png]] | + | [[File:Eclipse-select-workspace.png|450px|border]] |
* [http://groovy.codehaus.org/Eclipse+Plugin Install the Groovy-Eclipse plugin]. | * [http://groovy.codehaus.org/Eclipse+Plugin Install the Groovy-Eclipse plugin]. | ||
* Close Eclipse | * Close Eclipse | ||
| Line 24: | Line 24: | ||
==Create projects== | ==Create projects== | ||
| − | + | === Create a Java Project for the Freeplane binaries === | |
| − | [[File:Eclipse-create-project-freeplane_bin-0.png]] | + | |
| − | [[File:Eclipse-create-project-freeplane_bin-1.png]] | + | [[File:Eclipse-create-project-freeplane_bin-0.png|700px|border]] |
| − | [[File:Eclipse-create-project-freeplane_bin-2.png]] | + | |
| − | + | 2. Set the project name to the name of the folder containing the Freeplane binaries | |
| − | [[File:Eclipse-create-project-scripts-0.png]] | + | |
| − | [[File:Eclipse-create-project-scripts-1.png]] | + | [[File:Eclipse-create-project-freeplane_bin-1.png|500px|border]] |
| − | [[File:Eclipse-create-project-scripts-2.png]] | + | |
| − | [[File:Eclipse-create-project-scripts-3.png]] | + | 3. Allow scripts access to the Freeplane libraries |
| + | |||
| + | [[File:Eclipse-create-project-freeplane_bin-2.png|500px|border]] | ||
| + | |||
| + | === Create a Groovy Project for the scripts (even if you have none) === | ||
| + | |||
| + | [[File:Eclipse-create-project-scripts-0.png|700px|border]] | ||
| + | |||
| + | 2. Set the project name to the name of the folder containing the scripts | ||
| + | |||
| + | [[File:Eclipse-create-project-scripts-1.png|500px|border]] | ||
| + | |||
| + | 3. Connect the scripts with the Freeplane libraries. | ||
| + | |||
| + | [[File:Eclipse-create-project-scripts-2.png|700px|border]] | ||
| + | |||
| + | 4. Select a different output folder. Otherwise a lot of .class files would pollute the scripts directory. This is not required but helpful. | ||
| + | |||
| + | [[File:Eclipse-create-project-scripts-3.png|900px|border]] | ||
==Using Eclipse== | ==Using Eclipse== | ||
| − | + | === Edit a script === | |
| − | [[File:Eclipse-edit-script.png]] | + | [[File:Eclipse-edit-script.png|900px|border]] |
===Magic keys=== | ===Magic keys=== | ||
Revision as of 21:28, 30 March 2012
Modern Integrated Development Environments like Eclipse or Idea make it much easier to edit Groovy scripts for Freeplane as in a normal text editor. Syntax highlighting, code completion, error detection, debugging and source navigation are extremely useful especially if you are not that experienced.
But it's more or less difficult for beginners to setup an IDE properly for Groovy scripting, so here's a step-by-step guide:
Contents
Installations
- Download and install a "Eclipse IDE for Java Developers" or "Eclipse for RCP and RAP Developers" (the latter is more useful for regular Freeplane developers) from Eclipse download page.
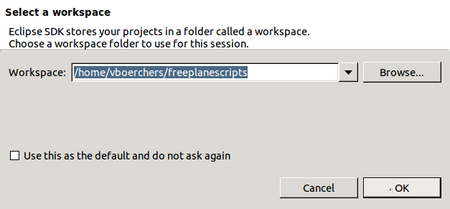
- Launch Eclipse for the first time and select some directory as your workspace root
- Install the Groovy-Eclipse plugin.
- Close Eclipse
Setup workspace
- Copy existing Freeplane scripts to workspace (if you have some):
cp -R ~/.freeplane/1.2.x/scripts/ ~/freeplanescripts
- Download current Freeplane binary distribution and unpack it into the workspace, and rename directory:
   cd ~/freeplanescripts
   unzip freeplane_bin-1.2.13.zip
   mv freeplane-1.2.13 freeplane_bin
- Download matching Freeplane source distribution and unpack it into the workspace and rename directory:
   cd ~/freeplanescripts
   tar -xzvf freeplane_src-1.2.13.tar.gz
   mv freeplane-1.2.13 freeplane_src
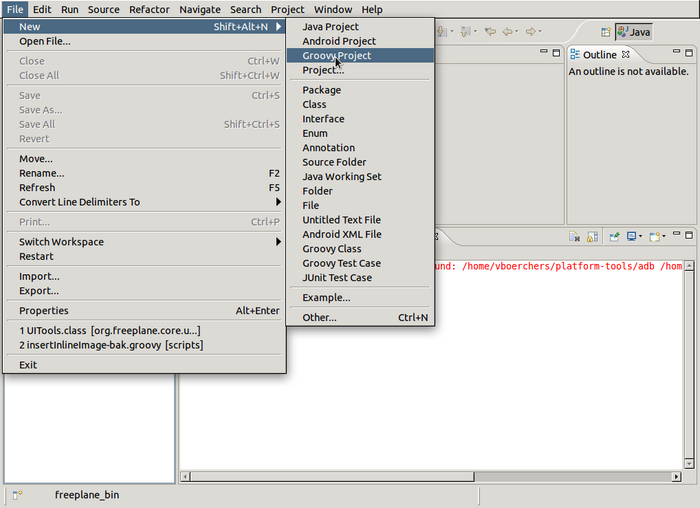
Create projects
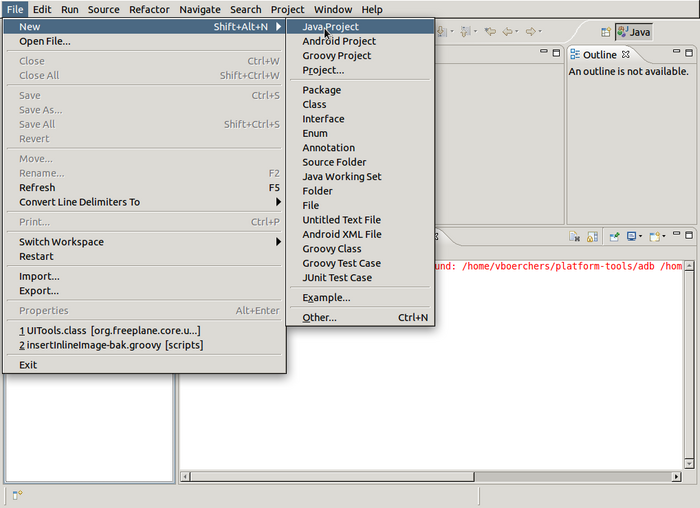
Create a Java Project for the Freeplane binaries
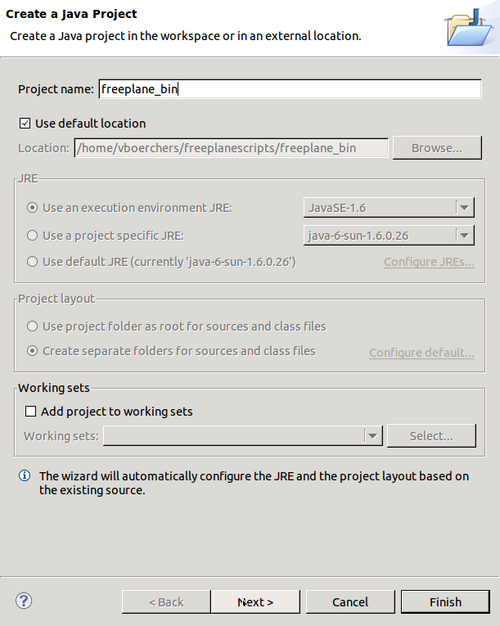
2. Set the project name to the name of the folder containing the Freeplane binaries
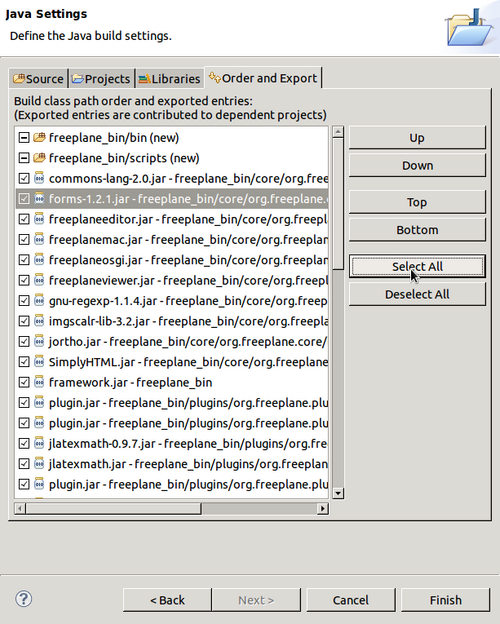
3. Allow scripts access to the Freeplane libraries
Create a Groovy Project for the scripts (even if you have none)
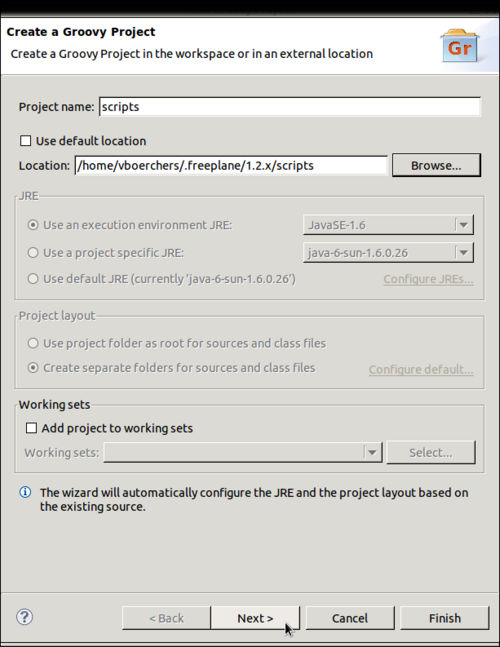
2. Set the project name to the name of the folder containing the scripts
3. Connect the scripts with the Freeplane libraries.
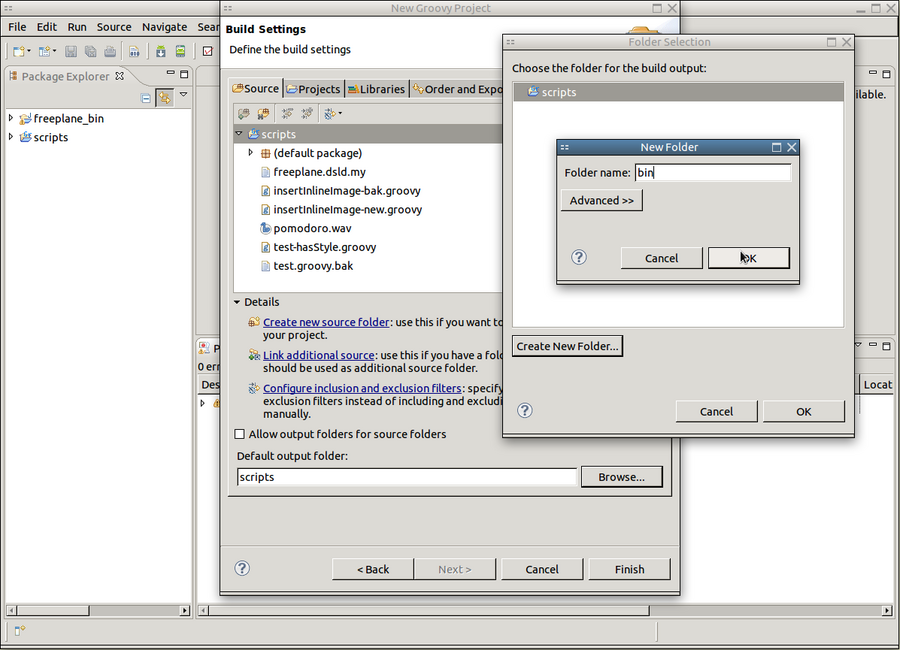
4. Select a different output folder. Otherwise a lot of .class files would pollute the scripts directory. This is not required but helpful.
Using Eclipse
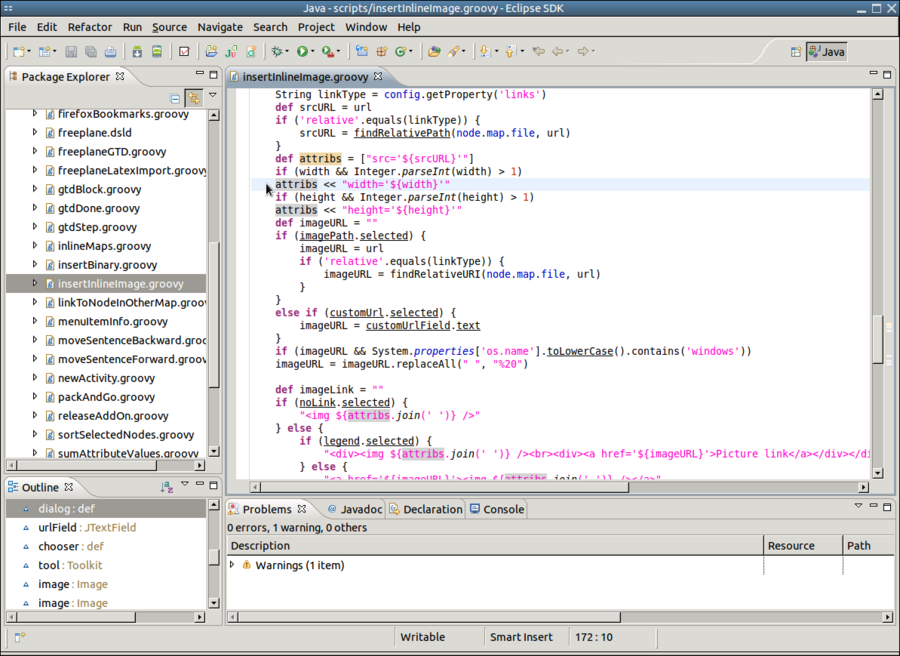
Edit a script
Magic keys
- ALT+Space
- Initiates content assist, completes typed texts.
- Import declarations for completed types are automatically added.
- Example: type "str" (without the quotes) and hit ALT space.
- F3
- Navigates to the definition of the variable/class under the cursor.
- This also works for Java and Freeplane classes - allowes to lookup details of the class.
- ALT+Cursor_Left
- Navigates to the last remembered location.
- Shift+Ctrl+T
- Open a type (e.g. a class or interface).
- Try entering "proxy" and select the Proxy from org.freeplane.plugin.script.proxy
- Proxy is the API definition.
- Shift+Ctrl+R
- Use this to open a script.
